Showing posts with label fun crafts. Show all posts

Saturday, September 15, 2012

Steelers nails!!!!!!!

Get ready for the game tomorrow! Maybe this is what our good luck charm could be!?!?!?

Colors you need!
Red
Blue
Yellow
Black
White

Toothpick!
Q-tip with the cotton ripped off

Step one: paint your nails white!

Step two: make a black French tip!

Step thee: use the flat end of you q-tip to make a small yellow circle.

Step four: tip the end of your toothpick in the yellow paint an touch it to the top bottom and each side. To create a small diamond!

Step five: repeat with red and blue!

Step 6: clear coat!!!!!!!!


Thursday, September 6, 2012

Mario super mushroom nails!

I love sitting around playing old school video games!!! Mario is my favorite! So here are some nails that I am sure will strike up quite a few conversations! :-)


Colors you need:
Cream
White
Black
Red

Tools:
Toothpick
Polish remover


Start off with a cream coat.

Now as you can see in my pictures I just painted the bottom part of my nail red as if it were supposed to be a French. After looking at my nails I noticed that in order for it to really look like a mushroom I messed up. Instead of the tip facing the normal manicure way it should have been opposite. I'll put up pictures as an example.

Next, on the cream top part make two small white dots. This will be part of the eye so keep it small

Dip your tooth pick in black and just fill out the top part of the eye.


Next using white again, make one larger oval in the middle of the red and two smaller ovals on each side.


Finish off with a top coat. and remember to let your nails dry in between each layer!!!!


Here is where you can see what i was talking about the reverse french tip. here is how all the tips should look so that they look like little mushrooms!!!!

Friday, August 31, 2012

Orange blue and glitter nails!!!!


These are easy and I think look like they took a lot more time then they really did!


Start by painting your nails orange!


Take silver polish and paint the top right corner. You can use some scotch tape if you want to make a really straight line.

Let that dry.

Next take dark blue and just paint the tip of the glitter. It should make it look like the glitter is just a thin line!


Top off with clear coat!

Ta-da!!!!


Tuesday, August 28, 2012

Color me rad nails!

I had so much fun this past weekend at the color me rad 5K that I wanted to keep on being reminded of it! So I did color me rad nails!


All you need is:

5 random colored polishes
1 white polish
A tooth pick
A Q-tip with the fluffy part pulled off!!
Clear coat


Paint your nails white!


Dip your q-tip into your first color and make on dot per nail.

Dip your toothpick in the same color an drag it from the dot to the top of your nail.

Repeat with all five colors.

Finish off with clear coat.


Wednesday, August 15, 2012

Words With Nails!


Hey everyone!!

Okay so I do not have a steady hand when to comes to painting my nails. So sometimes I see nails that I really want to do but I cant because I can not hold my hand steady for some of the designs! So I found a new option!!!

This can be used with magazine clippings or normal printer paper. But the only problem is that is really doesn't last that long, but it is perfect for one night events!

I used text but you can use pictures or whatever you want!

Check out my sisters website so you can have great nails and a great a body!


Paint your nails white! If there is any white on the paper you need to paint them  white. If not it will show through and change the color of the picture.


Print what you want on your nails and trim it down so it is small enough to fit on your nails.

Roll your paper a little bit in between your fingers so that it has a nice curl. Put a Clear top coat on your nails and then quickly place your paper on your nail. using a tooth pick press the edges down repeatedly until they are flush against your nail!

Add a top coat. (super super important!)


Monday, August 13, 2012

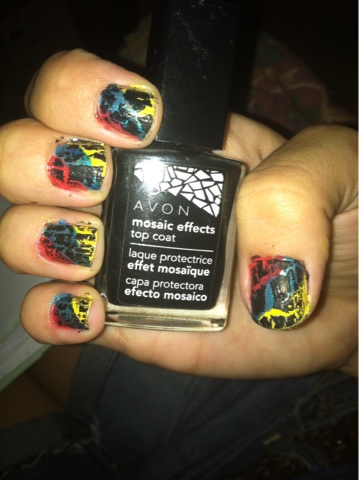
Crackle fun!


I get bored very easily. I loved using crackle about the first three times I used it. After that it just felt like I was doing the same thing over and over. So here is a few ways to make it a little more fun!

I only have black crackle! But this post isn't about colors it's about fun stuff you can do under your crackle!


All you have to do it paint your nail three different colors!
I just painted my nails pink and put a white messy line hoping it would give it a fun look!

I think it works!


Glitter is always a fun option!!!!
I wanted this one to look like tie dye!


Thursday, August 9, 2012

Glittery fun nails!

Who doesn't love glitter!? I know I do. These nails were simple and are very pretty and girlie!

Here all you need!

White polish
Glitter polish
A make up sponge/ something of that texture
Tweezers
Polish remover

Start with a white base coat. You can also use any pale pastel. Let dry.

Tear off a small part of the make up brush.

Using the glitter polish brush make a small pile of polish.

Take the tweezers and grab the bit of make up brush. Dip into your polish.

Starting at the top of your nail dab the polish on your nail. Try and keep the polish heavier at the top and make it thin out about half way down.

Top it off with a clear coat!!!

This is the finished product! It looks a lot better in real life so try it and see for yourself!!

Paint your nails white!
Tear off a part of your make up brush
Dip into glitter polish

Don't forget your clear polish!!!
All done!!! Easy huh?!

Wednesday, August 8, 2012

Skull nails!!!

These were super easy! All you need it black and white nail polish and a tooth pick!

Paint your nails black.

Using your white polish paint an oval on then center of your nail.

Take your tooth pick and dip it into a small amount of white polish. Make three tiny lines under each oval.

Using your toothpick again make two small dots above the left hand corner of one oval and then drag the tooth pick down to the oval. This will create a bone sticking out of one corner of the oval. Do this all four corners!

Now dip your tooth pick into the black paint and make three dots in the oval. Two for the eyes and one for the nose.


Finish it off with a clear top coat!!!!!!


Tips: make the bones quickly, if the polish starts to dry it won't work.

Let nails dry in between layers

And lastly, use a few tooth picks. At first I used one for a few nails an as I went the polish started to dry and get clumpy and just made a big mess. But once I started using fresh tooth picks it was easy!

Paint nails Black
Add small white ovals
Make three small white lines under oval
Make two small lines and drag tooth pick to oval, create a bone!
Make eyes and nose!!


Add top coat!!! And then you are all done!!!